
Building or refreshing an MRI suite is not simply a matter of putting equipment near the scanner. Every item needs a defined purpose, a safe storage location, an appropriate MRI designation and a place in the facility’s workflow. A comprehensive MRI room equipment checklist helps leaders coordinate patient care, infection control, emergency readiness and access control before a missing item becomes a delay or a safety event.
This practical MRI suite equipment list is organized around the four-zone model and then by purchasing category. It is designed to help facility managers, MRI safety officers and clinical teams identify what equipment an MRI room needs while recognizing that local policy, scanner manufacturer instructions and patient population determine the final setup. Use it alongside your ACR-aligned safety program and Joint Commission readiness process—not as a replacement for the requirements, professional judgment or manufacturer documentation that apply to your facility.
MRI Room Setup Checklist: Start With the Four Zones
The most useful MRI room setup checklist follows the route patients, visitors, staff and equipment take from public space to the magnet room. The four-zone model separates unrestricted areas from increasingly controlled spaces. Equipment control must become more stringent as an item moves toward Zone IV. For a deeper overview of the workflow, read MRI Safety Zones Explained: What Zone I–IV Really Mean in Daily Practice.
Zone I: General Public Area
Zone I is the public-facing portion of the department: the entrance, waiting space and arrival route. It is not the place to store MRI-approved equipment for later use, but it is where clear communication begins. Establish a visible route to the department and reinforce that the MRI environment has specialized access controls.
MRI safety signs that identify the MRI area and direct patients and visitors to the appropriate check-in or screening process.
Current screening forms, patient instructions and a secure process for collecting them before the patient advances to controlled areas.
Waiting-area communication that tells visitors not to bring loose metallic items or unapproved equipment farther into the department.
A defined handoff process so patients needing mobility assistance receive it from trained staff rather than being moved toward the scanner in a standard wheelchair.
Signs are not a substitute for screening, but they make the safety process visible. A well-planned sign program should be consistent with your zone boundaries, languages and visitor flow. The Complete Guide to MRI Safety Signs can help teams plan sign types and placement.
Zone II: Screening and Patient Preparation
Zone II is where the patient transition becomes deliberate. This is the screening and preparation area, where staff review forms, resolve questions, secure belongings and prepare the patient before access to the controlled portion of the suite. The equipment here should support a repeatable process—not create clutter that obscures it.
Screening forms and a documented process for implant history, medical devices, prior procedures and other MRI-safety questions.
MRI safety signage explaining restricted access, screening expectations and zone boundaries.
Secure changing and personal-item storage consistent with the facility’s process.
Approved screening resources and, where adopted by the facility, ferromagnetic-detection workflow and staff training. Learn more in Ferromagnetic Detection Systems: How They Work.
Comfort supplies and appropriate patient garments selected under local infection-control and MRI safety procedures.
Keep responsibilities clear: screening is not completed just because a form was handed to a patient. The facility should define who reviews it, who resolves discrepancies and who authorizes advancement to later zones. For a complementary process review, see Pre-MRI Screening Protocols: How to Reduce Risk.
Zone III: Controlled Access and Preparation
Zone III is a restricted area where access should be controlled by trained MRI personnel. It often supports final preparation, patient monitoring, equipment staging and the handoff into Zone IV. This is the point where a complete inventory and a clear “approved versus not approved” process become essential.
Restricted-access signs and zone markers that reinforce the controlled boundary.
MRI patient monitoring systems and the supplies required by the facility’s patient-care protocol.
MRI carts for staged clinical, utility, linen or emergency supplies, selected and labeled according to their permitted zone.
Storage for coils and imaging accessories; use a planned solution so equipment does not block transport routes. Browse MRI Imaging Aids when planning imaging-support items.
Only equipment that has been identified, inspected and approved for its intended location. Your inventory should show its MR status, model and applicable conditions.
Zone III is also the place to prevent unsafe substitutions. If an item is missing, staff should follow an escalation process rather than bringing in an ordinary hospital device. Review the distinction in Understanding MR Safe, MR Conditional and MR Unsafe Labels.
Equip Your Team with Tools They Can Trust
Get high-quality, MRI-dedicated equipment that supports safer scans, better positioning, and smoother patient care.
View Trusted ProductsZone IV: MRI Magnet Room
Zone IV contains the scanner and demands the strictest equipment control. Only items documented as MR Safe or MR Conditional for the intended conditions may enter. “Non-magnetic” is not enough on its own; a product’s manufacturer label and instructions for use determine whether, where and under what conditions it can be used. Before any item enters, check its complete configuration, including accessories, batteries, pads and attachments.
MRI wheelchairs and MRI stretchers for approved patient transport.
MRI Carts for the facility’s anesthesia, emergency/crash, utility, linen and coil-storage workflows. Confirm each cart’s label and contents before it moves into Zone IV.
Patient comfort and positioning products, including appropriate supports, blankets and related aids selected for the planned exam and cleaning process.
Sanitary headset covers and MRI patient audio/communication equipment as approved for the scanner and infection-control workflow.
Non-magnetic tools and approved clinical support equipment such as IV stands and monitors, each verified for its exact intended conditions.
An MRI-specific emergency and fire-response plan. The type, location and suitability of fire extinguisher, oxygen-delivery and emergency equipment must be determined under facility policy and manufacturer documentation; see MRI Oxygen Equipment Safety for oxygen-specific context.
Appropriate lighting, clean storage and coil management so cords, supplies and accessories do not create preventable trip or transfer hazards.
Zone IV should not become a catch-all storage room. Keep only the equipment that supports the current workflow, verify it on a scheduled basis and remove items that are not approved or needed. The MRI Zone IV equipment guide is a useful companion for this review.
By-Category MRI Suite Equipment List
Patient transport
Plan for both seated and supine movement. MRI wheelchairs support approved seated transport, while MRI stretchers support patients who require a lying surface or more assisted transfer. Build the selection around published capacity, dimensions, route clearance, patient population and the model-specific MR designation. The broader MRI patient transport collection can help coordinate the pathway. Train staff on brakes, rails, footrests, handoff points and the decision to use a chair versus a stretcher.
Medical carts and clinical readiness
Anesthesia, emergency/crash, utility, linen and coil carts each solve a different workflow problem. Start with MRI carts, then define which cart is required in each zone, who owns restocking and what items may be carried into Zone IV. A cart may be compatible while an item placed on it is not, so inventory the contents as carefully as the cart itself. For emergency planning, pair the physical setup with this MRI crash-cart equipment checklist and your facility’s established response protocol.
Patient comfort, positioning and communication
Comfort supports patient tolerance and image quality, but every positioning aid must be suitable for the intended MRI setting. Choose MRI patient comfort products for approved positioning aids, blankets and patient-care accessories. Include communication procedures and scanner-compatible audio equipment so patients can receive instructions and alert staff during the exam. For hygiene, stock MRI sanitary headset covers within the infection-control process and confirm the selected cover fits the approved headset system without affecting its use.
Safety equipment and access control
Safety equipment includes the controls that stop unsafe equipment and untrained people from reaching the magnet. Use MRI safety equipment and MRI safety signs to support your zone plan, then establish inspection, replacement and staff-training procedures. Signs should identify access restrictions and hazards at the point of decision. For detail on labels and symbols, consult ASTM MRI Safety Labels: What You Need to Know.
Tools, instruments, monitoring and imaging support
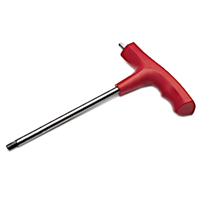
Do not let “small” equipment escape the checklist. Maintain approved non-magnetic tools, evaluate IV stands and clinical instruments by their individual documentation, and select MRI patient monitoring systems appropriate for the level of care. Include coil supports, accessory organization and other MRI imaging aids in the inventory. An item’s MR Conditional status can be contingent on field strength, position or configuration, so use the label—not memory—as the source of truth.
Cleaning and infection control
Cleaning supplies, linens and patient-contact accessories must support infection control without undermining MRI safety. Create a replenishment list for approved cleaning products and single-use supplies, and stage them in the correct zone. The MRI infection control and cleaning collection and sanitary headset covers can help teams plan these routine needs. Document who checks stock, who cleans reusable items and when worn covers or accessories are replaced.
How to Put This MRI Room Equipment Checklist to Work
A useful checklist is living operational documentation, not a one-time purchasing worksheet. Assign an owner to every category, record the manufacturer, model and serial number where applicable, and retain the current instructions for use with the approved-equipment record. For MR Conditional equipment, capture the relevant conditions—such as field strength, spatial-gradient limits, position, accessories or other restrictions—so staff are not forced to rely on memory during a busy shift.
Then walk the actual patient and equipment route. Start in the waiting area, repeat the screening handoff in Zone II, check who controls Zone III access, and follow a wheelchair or stretcher through the final transfer into Zone IV. This exposes practical gaps that a spreadsheet may not show: a blocked doorway, a missing brake check, a cart that has not been restocked, a headset-cover supply stored too far away or a sign that is easy to miss at the moment of decision.
Review the MRI suite equipment list on a scheduled cadence and after changes to the scanner, construction, vendor equipment, patient services or emergency plan. Include frontline technologists, nursing, anesthesia or sedation staff where applicable, facilities, infection prevention and the MRI safety officer. The result is a room setup checklist that connects purchasing with training, inventory control and daily patient care.
Download Our Free Printable MRI Room Equipment Checklist
Download our free printable MRI Room Equipment Checklist to turn this guide into a site-specific rounding tool. Before publishing a downloadable asset, tailor it to the facility’s scanner, zone map, approved-equipment inventory, emergency plan and purchasing process. Include fields for model number, MR designation, applicable conditions, inspection date, owner and replacement status so the checklist supports an auditable routine rather than a one-time shopping list.
MRI Room Equipment Checklist FAQs
What equipment is required in an MRI room by ACR standards?
There is not one universal shopping list that applies identically to every MRI suite. Required controls and equipment depend on the facility, scanner, patient services and applicable standards. A practical baseline includes controlled access, screening processes, appropriate signage, approved patient transport, communication, emergency planning and equipment documented for its intended MRI use. Confirm requirements with current ACR guidance, local policy and the scanner manufacturer.
Can you bring regular hospital equipment into an MRI room?
Not unless the specific item is documented and approved for the intended MRI environment. Ordinary hospital equipment contains ferromagnetic materials and other hazards. Review the model-specific MR Safe, MR Conditional or MR Unsafe labeling and follow the stated conditions before it moves toward Zone IV.
How often should MRI room equipment be inspected?
Use a documented schedule based on manufacturer instructions, facility policy, equipment type and risk. Check high-use transport and clinical equipment before use as appropriate, and perform routine inventory, condition and labeling reviews. Inspection should also follow repairs, accessory changes, incidents or changes to the scanner environment.
What is the most commonly forgotten MRI room equipment?
Facilities often focus on large items and overlook supporting controls: current signage, headset hygiene supplies, accessory documentation, approved tools, coil-storage planning, clear emergency procedures and the inventory record that shows whether an item is truly approved. A zone-by-zone walk-through helps reveal these gaps.
What equipment does an MRI room need for safe patient transport?
The answer depends on patient needs and facility workflow, but commonly includes approved MRI wheelchairs and stretchers, trained staff, route clearance, transfer procedures and equipment documentation. Review the product’s MR designation and conditions before use, and integrate transport into the facility’s zone controls.


