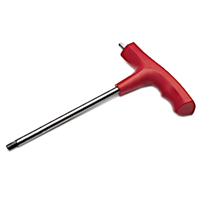

You are in the middle of a busy schedule, and a piece of equipment in Zone IV needs a quick adjustment. A technician grabs a wrench from the nearby maintenance cart, assumes it is fine because it looks like the one they used last week, and walks toward the magnet. Suddenly, the wrench pulls out of their hand, flying toward the scanner.
This type of scenario happens more often than anyone in our field likes to admit. Selecting the right tools for an MRI environment seems straightforward on paper. You just buy the non-magnetic ones, right? Unfortunately, that oversimplification leads to some of the most common mistakes choosing tools that are safe to use in MRI environments.
When facility managers and biomedical teams rush the selection process, the results range from minor workflow delays to severe safety hazards. This guide breaks down the most frequent MRI tool mistakes we see in the field. We will look at why these errors happen and, more importantly, how you can prevent them to keep your facility running safely and efficiently.
Why Choosing the Right Tools For Your MRI Environment Is More Complicated Than It Seems
Building a reliable inventory of tools for your MRI suite requires careful planning. It is not as simple as browsing a catalog and clicking purchase on anything labeled safe for the magnet.
Assumptions carried over from standard tools
Many facilities make the error of treating MRI maintenance tool mistakes like standard hospital equipment errors. A wrench is just a wrench in a normal hospital wing. In an MRI suite, a standard steel wrench is a dangerous projectile. Staff sometimes assume that because a tool works well in other departments, it belongs in the MRI room. This assumption bypasses the strict verification processes required for high-magnetic environments.
Gaps in understanding MRI safety requirements
Another contributing factor to MRI tool safety mistakes is a general misunderstanding of safety labels. The terminology around MRI safety has evolved, but not everyone has kept up with the changes. Staff might see a label that says "non-magnetic" and assume the tool can be used anywhere, at any time, which simply is not true.
Why small mistakes can create real risks
In a standard room, picking up the wrong screwdriver means you might strip a screw. In Zone IV, bringing in the wrong screwdriver can damage a multi-million-dollar machine or seriously injure a patient or staff member. Small gaps in purchasing protocols or storage habits snowball into massive MRI tool safety issues if left unchecked.
Mistake #1: Assuming “Non-Magnetic” Means Fully Safe
One of the most frequent MRI tools errors is misunderstanding the terminology stamped on the side of a tool.
Differences between MR Safe and MR Conditional
A tool marketed casually as "non-magnetic" is not automatically MR Safe. The American College of Radiology recognizes specific classifications. An MR Safe tool poses no known hazards in all MRI environments. An MR Conditional tool has been demonstrated to pose no known hazards in a specified MRI environment with specified conditions of use. Failing to understand this distinction is a major liability.
Why usage conditions matter
If you buy an MR Conditional tool, you must follow the precise conditions outlined by the manufacturer. These conditions might dictate the maximum static magnetic field strength or the specific spatial gradient field. Using an MR Conditional tool outside of these parameters turns a seemingly safe tool into an unsafe one.
How to properly evaluate tool safety
To fix this, your biomedical team and MRSO need to review the exact manufacturer specifications for every single item before it enters the suite. Do not rely on generic marketing terms. Verify the official MR Safe or MR Conditional ratings and ensure they match your specific scanner's environment.
Mistake #2: Choosing Tools Based on Material Alone
It is easy to look at a tool's material and make a quick judgment about its safety. However, material composition is only part of the story when it comes to MRI non magnetic tool safety.
Titanium vs aluminum vs mixed materials
Titanium and aluminum are highly popular materials for MRI tools because they are non-ferromagnetic. While a solid titanium wrench is generally a safe bet, many tools are not made from a single, uniform piece of metal.
Hidden components and fasteners
This is where facilities often stumble. A tool might feature an aluminum body but use standard steel screws or springs hidden inside the casing. If a purchasing manager only reads the primary material listing, they might miss these hidden ferromagnetic components.
Why design matters as much as material
The overall design and construction of the tool matter just as much as the primary metal. You need tools designed specifically for the MRI environment from the ground up, ensuring that every rivet, spring, and internal mechanism is entirely non-ferromagnetic.
Mistake #3: Buying Standard Tools for “Limited Use”
Budgets are always tight, and specialized MRI tools cost more than standard hardware store alternatives.
Why occasional use is still risky
Sometimes a manager will authorize the use of a standard tool for a quick, one-off repair, assuming they can safely manage the risk for five minutes. This is a massive lapse in judgment. The magnetic field is always on. It only takes one second of distraction for an accident to occur.
Misconceptions about distance from the magnet
Staff often rationalize this by saying they will only use the tool near the door of the scanner room, far away from the bore. The spatial gradient of a powerful MRI machine can extend further than people realize. A tool can easily be pulled from a technician's grip from across the room if they step past the invisible threshold.
Real-world consequences of shortcuts
Shortcuts lead to accidents. When you allow standard, MR Unsafe tools into the suite for limited use, you normalize breaking the rules. That normalization eventually results in a tool being left on a cart, only to be rolled too close to the magnet during the next patient scan.
Mistake #4: Not Matching Tools to Actual Workflow Needs
Even when facilities buy MR Conditional tools, they often buy the wrong assortment. Poor planning leads to significant MRI tool selection mistakes.
Equip Your Team with Tools They Can Trust
Get high-quality, MRI-dedicated equipment that supports safer scans, better positioning, and smoother patient care.
View Trusted ProductsMissing essential tools
When an MRI technologist or biomedical engineer needs to make an adjustment, they need the right tool immediately. If your facility only purchased a generic set of wrenches but routinely needs specific hex keys for your coils or table, your staff will face constant delays.
Overbuying unnecessary tools
Conversely, buying massive, comprehensive tool catalogs just to be safe wastes budget space. You end up with dozens of highly specialized instruments sitting in a drawer gathering dust, while the specific items you actually use wear out and need replacing.
Not considering day-to-day use
Talk to your technologists and biomedical staff before ordering. Find out exactly which fasteners they adjust daily. Build your inventory around their actual workflow, ensuring they have the exact sizes and types of tools they need to keep the schedule moving. For this reason, MRI Med offers individual tools, small toolkits, and comprehensive tool kits.
Mistake #5: Overlooking Tool Kits vs Individual Tools
Purchasing tools one by one often creates gaps in your inventory. This fragmented approach is a highly common error.
Incomplete tool selection
When you buy a screwdriver here and a wrench there, you inevitably miss a crucial size. This leads to the exact scenario we want to avoid: staff scrambling to find a workaround when a specific piece of equipment needs maintenance.
Organization and accessibility issues
Loose individual tools are notoriously hard to keep track of. They get left on counters, dropped in pockets, or accidentally taken out of the MRI environment entirely.
When a tool kit makes more sense
Investing in comprehensive MRI tool kits (or checking out a dedicated MRI non-magnetic tools page) solves these problems. A dedicated kit provides a complete set of commonly used sizes in a custom case. This makes it instantly obvious if a tool is missing at the end of a shift, helping maintain strict inventory control.
Mistake #6: Ignoring Storage and Access Control
Having the right tools means nothing if you store them incorrectly. Storage mistakes using tools in the MRI suite compromise the entire safety protocol.
Tools stored in the wrong zones
MR Conditional tools should be stored exclusively in the MRI environment, typically in Zone III or Zone IV. If you store them in a general maintenance closet, they will get mixed up with standard, MR Unsafe tools.
Unrestricted access to unsafe tools
If standard, MR Unsafe tools are kept anywhere near the MRI control room, the risk of cross-contamination skyrockets. A rushed contractor or technician might grab a standard tool by mistake because it was sitting on the wrong shelf.
Lack of labeling and control
Every tool meant for the MRI suite should be clearly labeled. Use dedicated, non-magnetic toolboxes or wall mounts inside the safe zones. Implement a strict policy that MRI tools never leave the department, and standard tools never enter it.
Mistake #7: Lack of Staff Awareness and Training
You can buy the best non-magnetic tools on the market, but human error will always be your biggest vulnerability.
Tools brought in from other departments
One of the most frequent MRI tool safety errors in a hospital occurs when an outside vendor or a maintenance worker from another floor enters the suite. They often bring their own standard tool belts, completely unaware of the invisible danger.
Inconsistent protocols
If your facility lacks a clear, documented protocol for tool use, your staff will create their own habits. Inconsistent rules confuse new hires and allow dangerous practices to slip through the cracks.
Preventing avoidable errors
Training is the ultimate fix. Every person who steps foot in Zone III, from the lead technologist to the janitorial staff, needs to understand why only approved tools are allowed. Regular safety drills and clear signage go a long way in preventing what not to do with tools in the MRI room.
How to Avoid These Mistakes in Your MRI Suite
Fixing these issues requires a proactive approach from management and technologists alike.
Standardizing approved tools
Create a rigid list of approved tools for your facility. Work closely with trusted vendors who specialize in MRI equipment, like MRI Med, to ensure every item meets the strict MR Safe or MR Conditional standards.
Reviewing equipment regularly
Conduct monthly audits of your tool inventory. Check for missing items, inspect tools for damage, and verify that no standard, MR Unsafe tools have accidentally migrated into your designated MR Conditional toolboxes.
Improving communication across teams
Safety thrives on communication. Ensure your biomedical team, your MRI technologists, and your facility managers are all on the same page. When everyone understands the real-world risks associated with MRI tools mistakes, compliance naturally improves.
The Right Tools Reduce Risk and Keep Operations Running Smoothly
Selecting the proper equipment for an MRI environment is a serious responsibility. By understanding the common mistakes choosing MRI tools—from trusting marketing jargon to ignoring proper storage protocols—you can build a safer, more efficient department. Focus on staff training, strict inventory control, and purchasing high-quality, verified non-magnetic tools that are specifically made for MRI environments. When you eliminate the guesswork from your equipment selection, you protect your staff, your patients, and your facility.


